
In the enterprise world, it is often mandatory for any web applications to support multi-tenancy. Multi-tenancy is a software architecture and approach where a single instance of a software application serves multiple customers or tenants. Each tenant is a separate entity with its own data, configurations, and user management, but they all share the same underlying software infrastructure. In other words, the software is designed to provide a single application instance that can be customised and configured for different organisations or users.
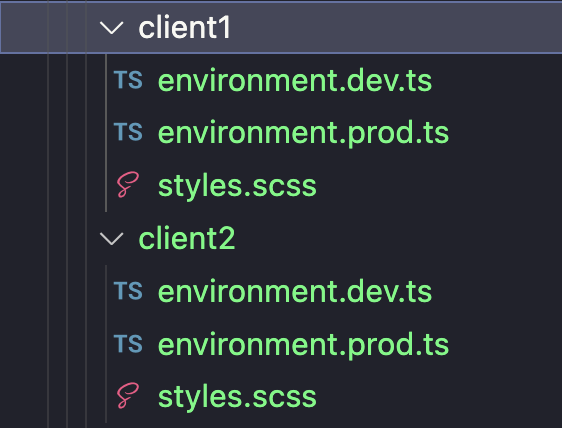
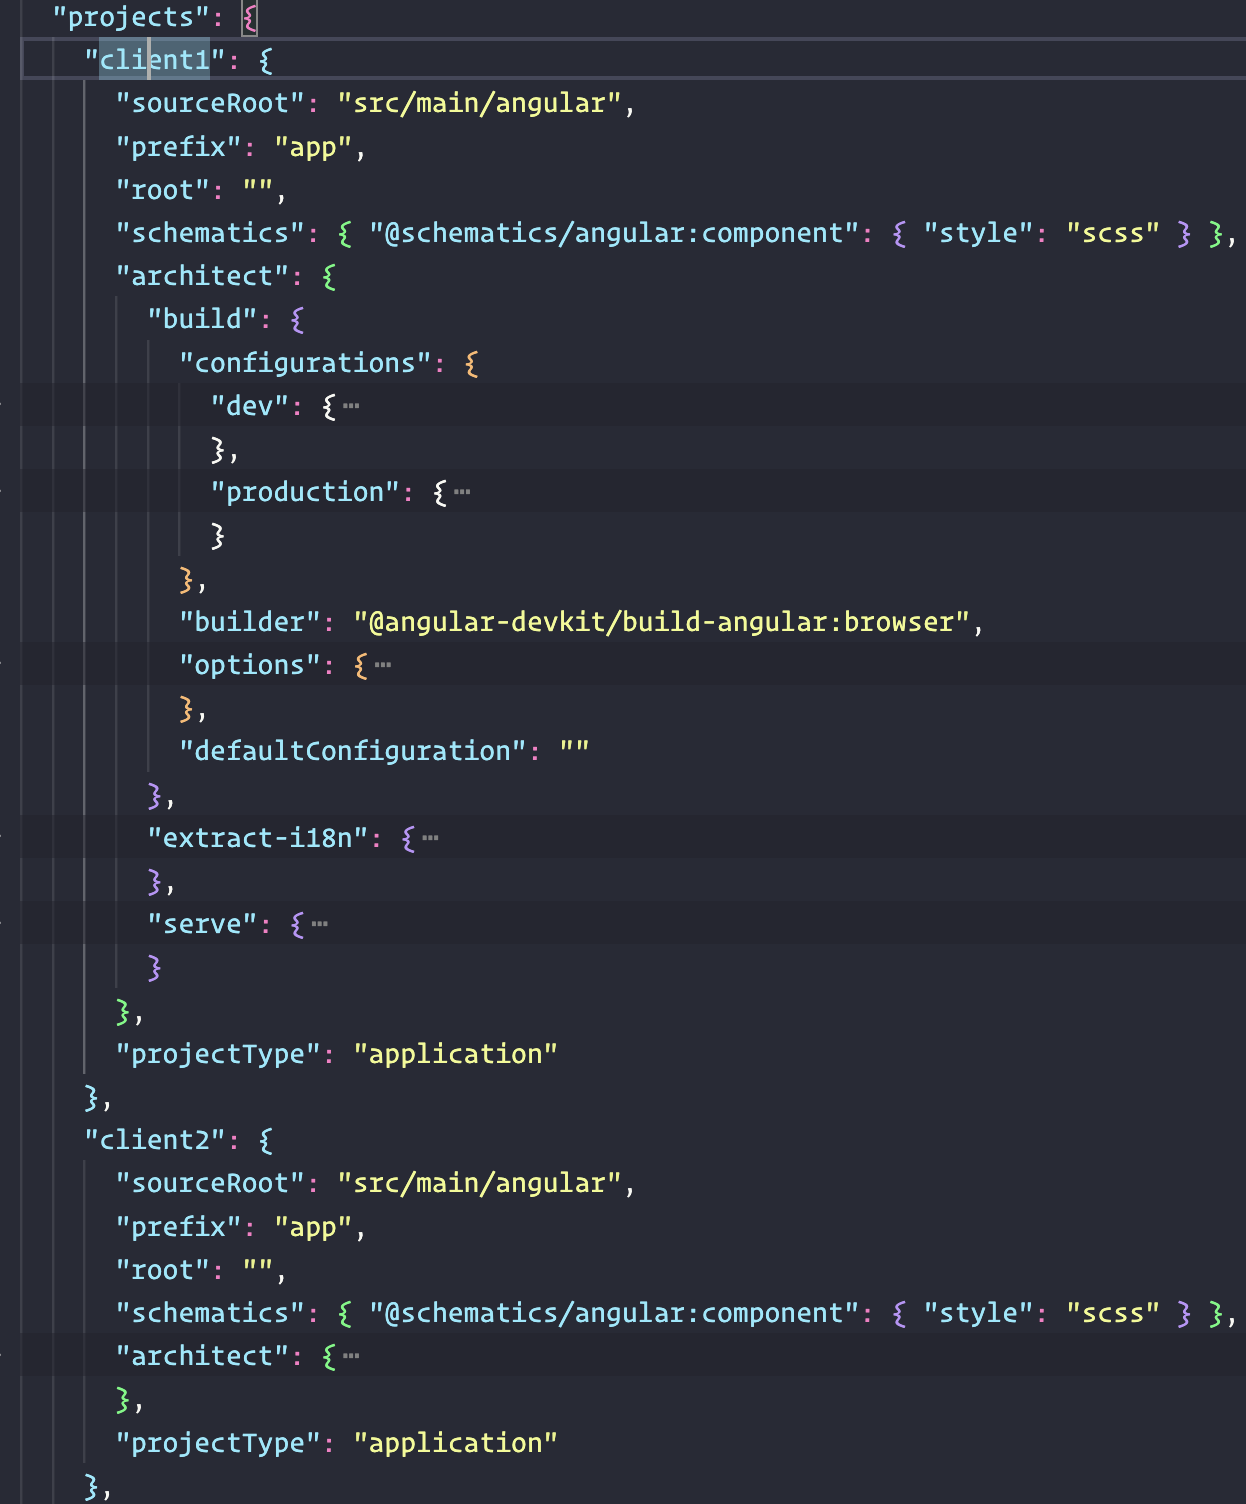
The multi-tenant application must allow varying static content such as customer’s logo/backgrounds, branding, CMS, 3rd party analytical SDKs in terms of Google Analytics, Freshdesk, Hotjar, etc. For that, it is often a recommended practice to keep all the static assets per customer in a dedicated folder and then have a separate project configurations in Angular CLI as shown below. This way you can build the application for each tenant one at a time, using the matched configurations.
However, there are several drawbacks to the aforementioned approach:
- You are rebuilding the same application multiple times just because of different static assets required by each customer.
- You are exponentially increasing the time taken by the CI/CD pipeline to build the same application for all the customers over and over, especially when the customers grow.
- You are able to run the application for one customer at a time, making it very time-consuming to switch between them locally.
To tackle these problems, I’m proposing a new approach to the multi-tenancy.
Multi-tenancy the modern way
In the new approach, you can build the application only once regardless of customers, keeping the CI/CD pipeline at O(1). You can even access the same application for multiple customers locally at the same time, increasing the productivity of developers at par. Let’s see how.
The major loophole in the existing approach is the static assets. Once you move away the static assets from the build-time and load them at run-time, you can win half the battle. But how do we load the correct static assets needed for a particular customer 🤔? The answer lies in the application url.
Map static assets to Application URL
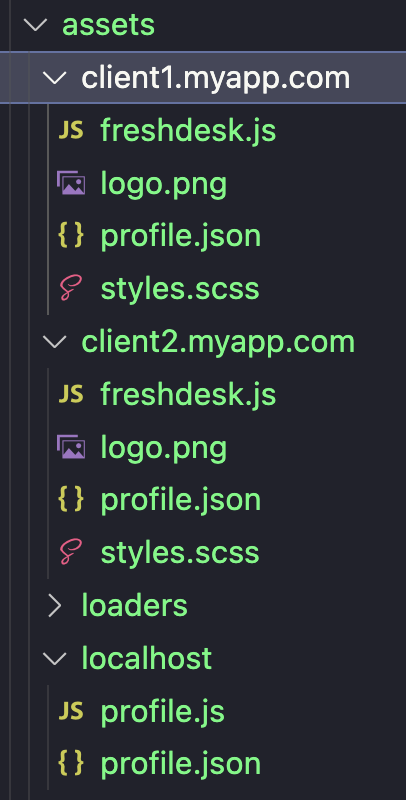
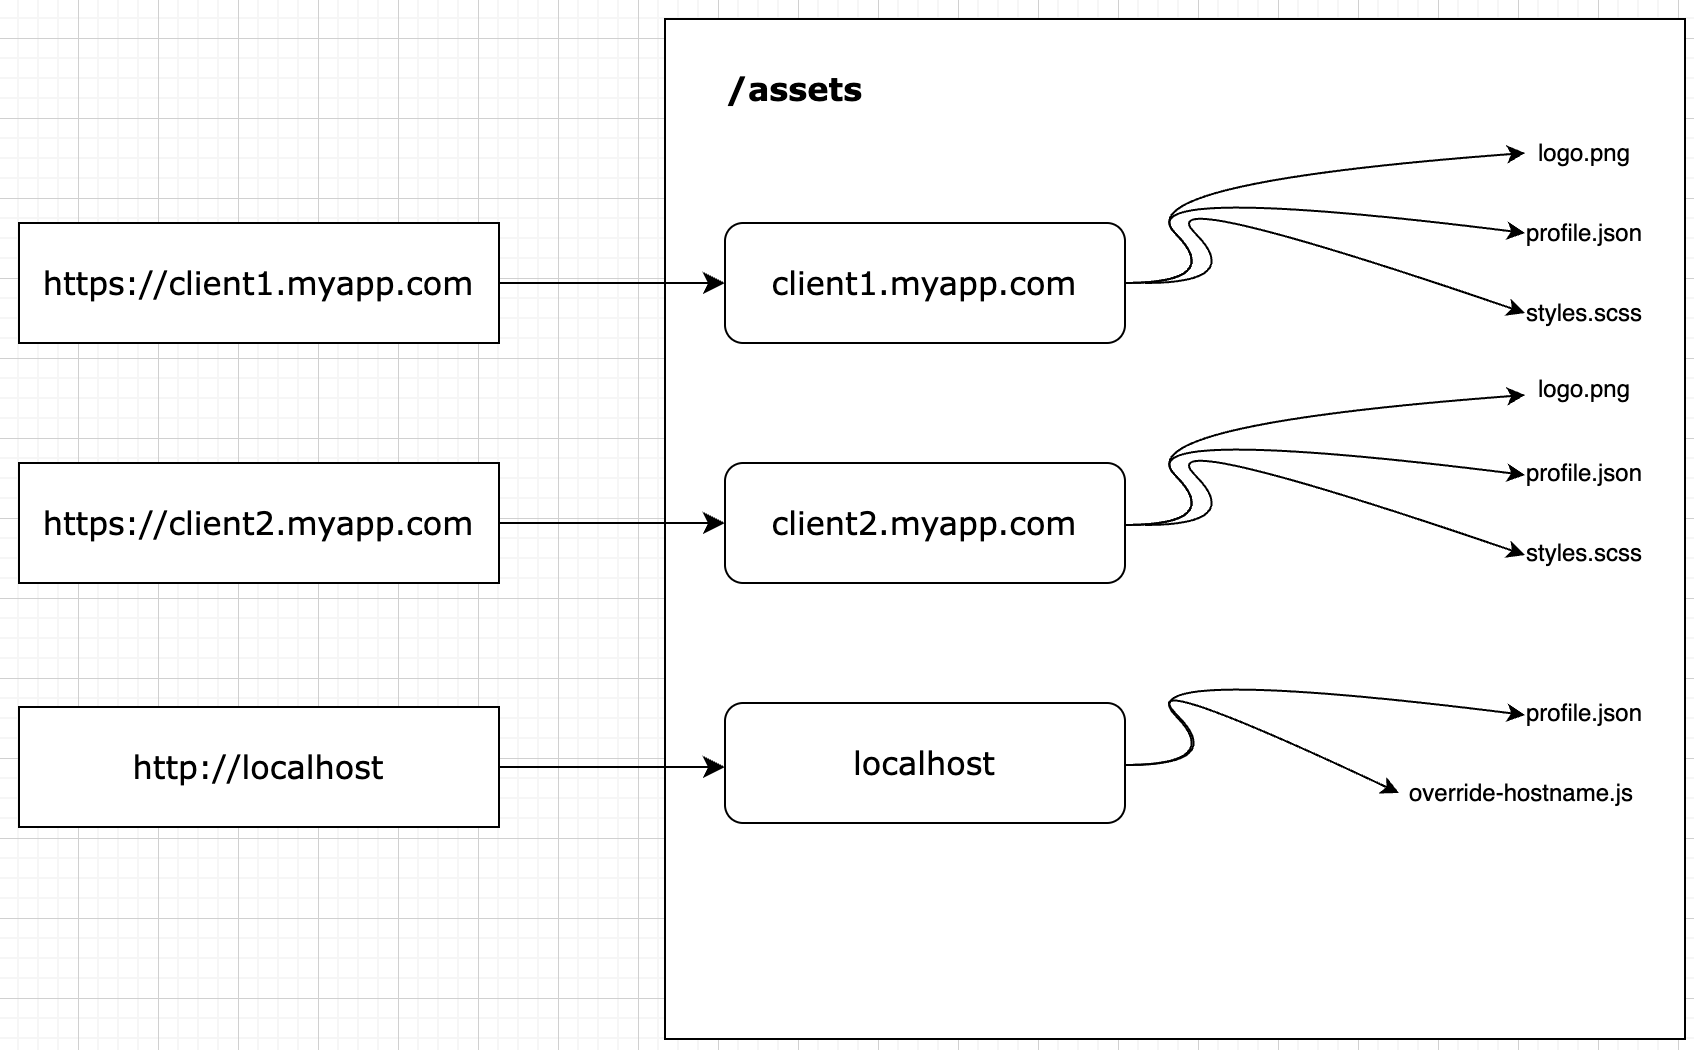
In order to map the application url to the respective static assets, we could create folders under /assets directory. Each of these directories will have customer’s logo, styles, profile.json, and 3rd party SDKs such as Freshdesk. The profile.json file may contain customer’s name and other metadata related to authentication or feature flags and that’s the first thing the application will fetch.
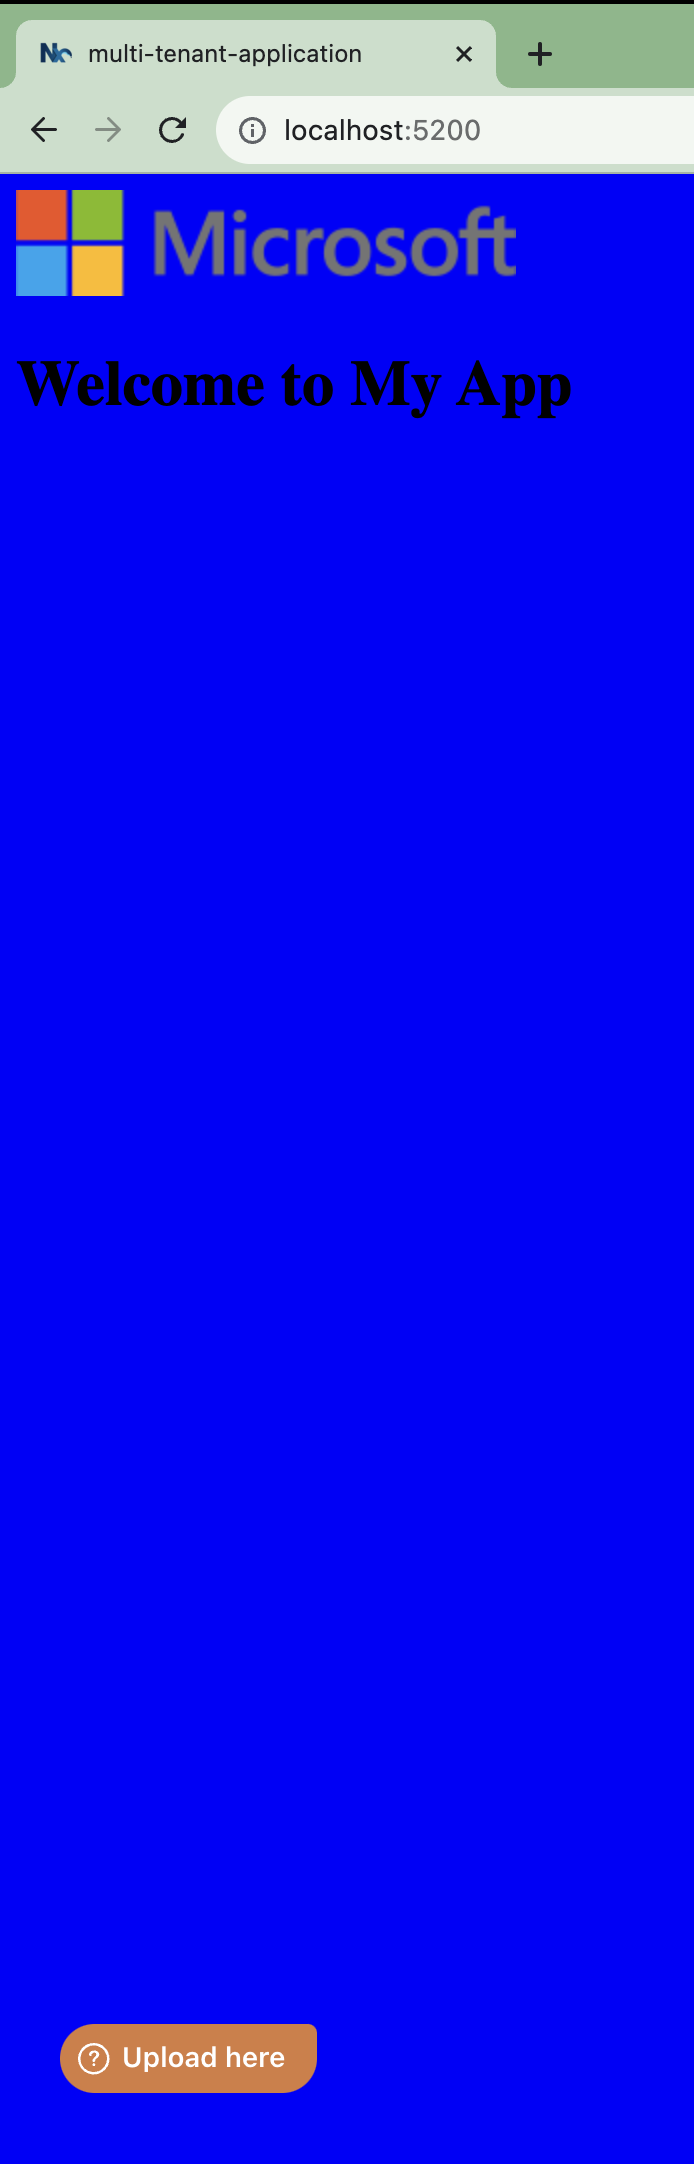
Here, when you access https://client1.myapp.com in the browser, we can read the hostname via window.location.hostname to find the appropriate static assets folder and query the profile.json file to apply customer specific feature flags and branding at run-time.
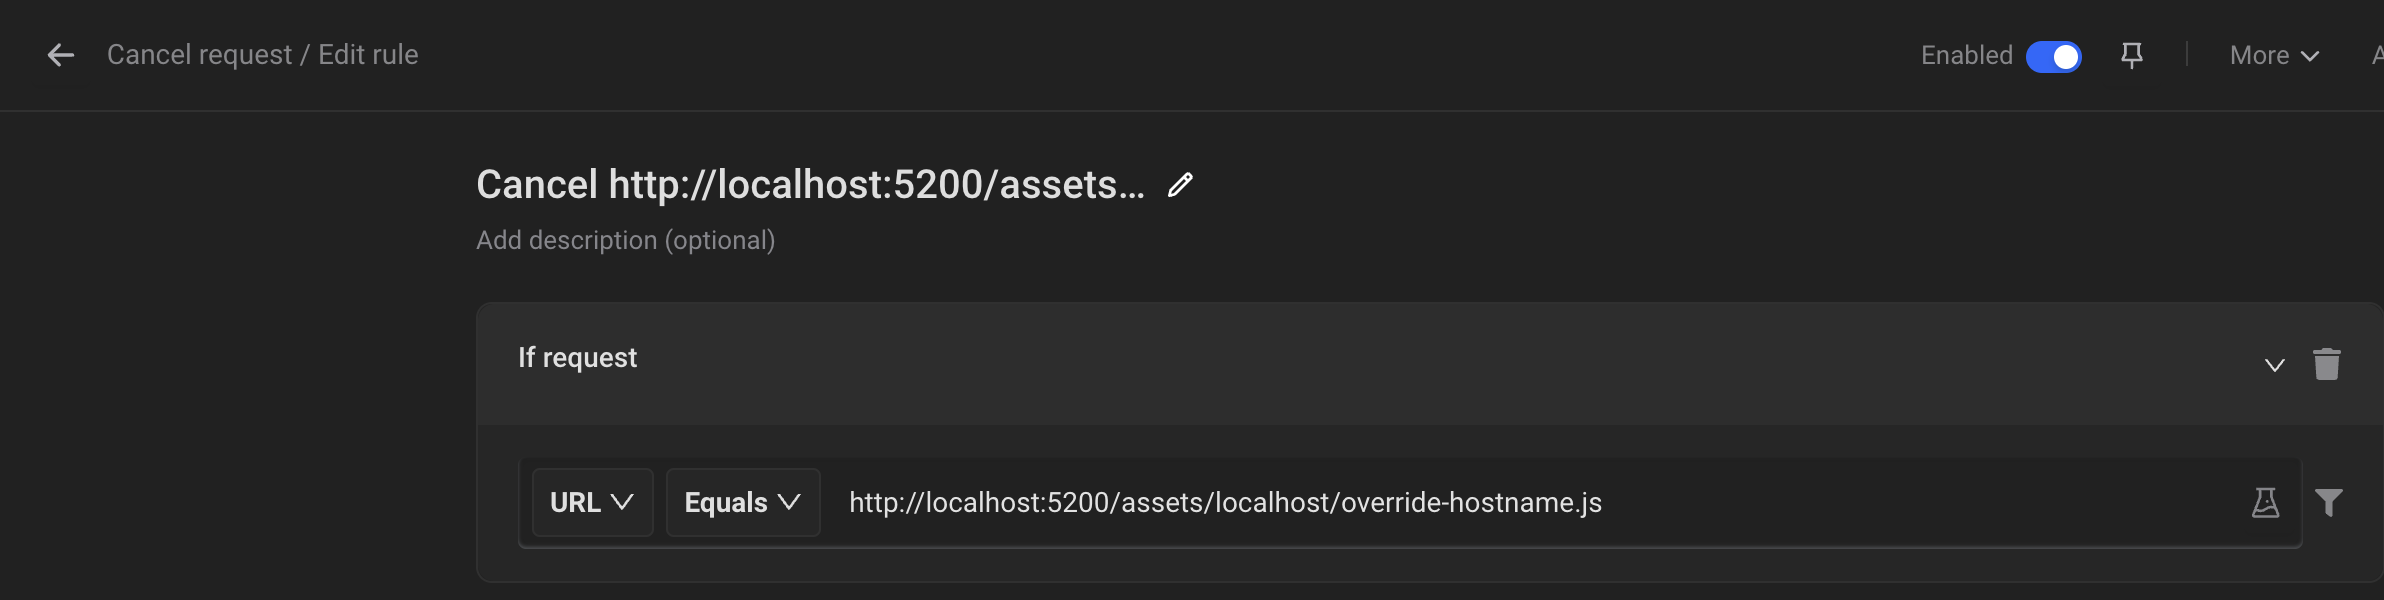
Override Application hostname
This is a crucial bit to avoid maintaining static assets under aforementioned localhost directory and instead point elsewhere. For that, we create localhost/override-hostname.js to override the application hostname and include the script tag in index.html.
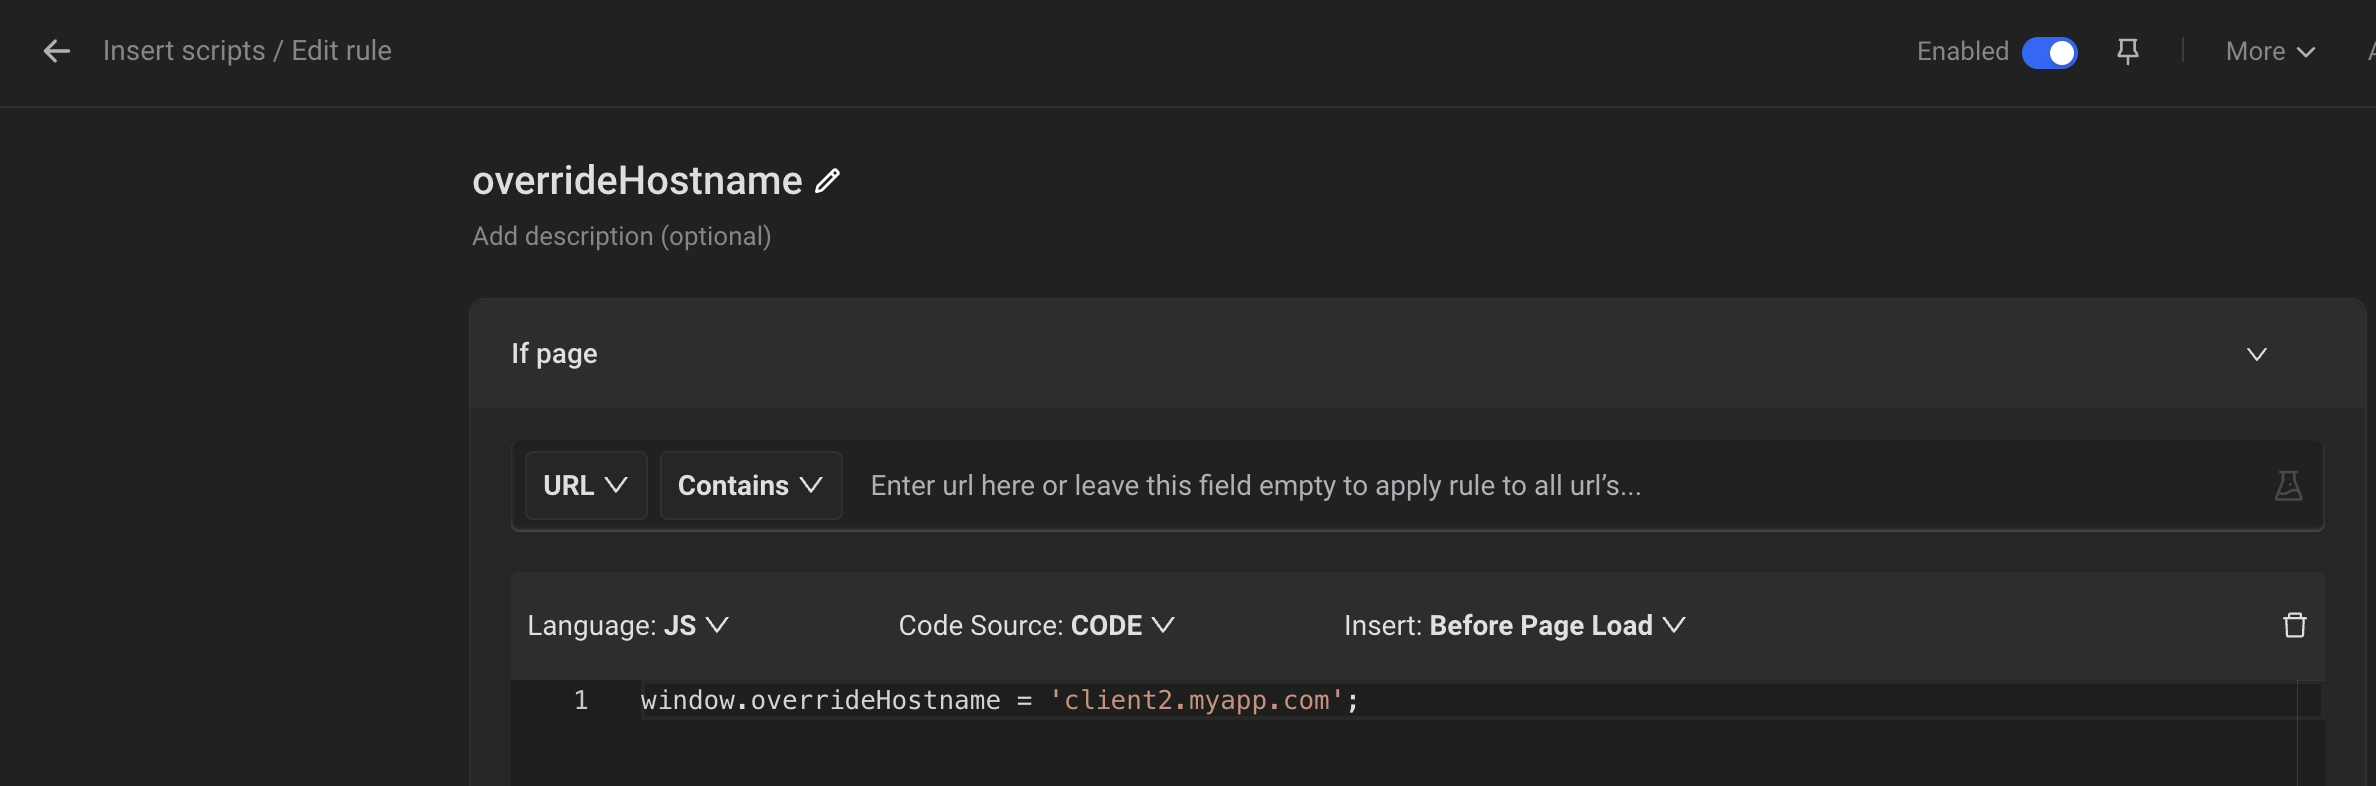
window.overrideHostname = 'client1.myapp.com';
This allows you to switch between different customers without restarting the application. For example, changing client1.myapp.com to client2.myapp.com, the application would load client2’s static assets at run-time.
Emit styles for all customers
In Angular/Nx CLI, you can compile multiple SASS files without injecting them into index.html.
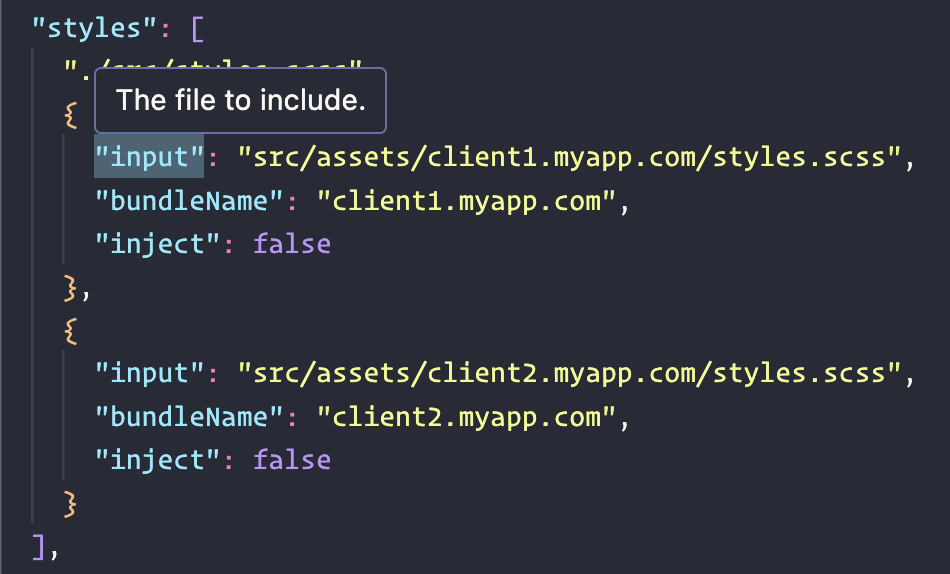
Then dynamically inject the appropriate styles at bootstrapping as follows:
bootstrapApplication(AppComponent, appConfig).then(() => {
  var style = document.createElement('link');
  style.rel = 'stylesheet';
  style.href = style.href = `${window.location.hostname === 'localhost'
    ? (<any>window).overrideHostname || window.location.hostname
    : window.location.hostname}.css`;
  document.head.appendChild(style);
});
Swap profiles using Requestly
Requestly is a browser extension that allows us to Intercept & Modify HTTP Requests which is going to play a major role in resolving the 3rd drawback (i.e. able to run the application for one customer at a time) we had earlier. So to resolve it, you must define 3 rules in Requestly:
1. Cancel http://localhost:5200/assets/localhost/override-hostname.js
2. Insert overrideHostname script
3. Change http://localhost:5200/assets/localhost/profile.json’s response.
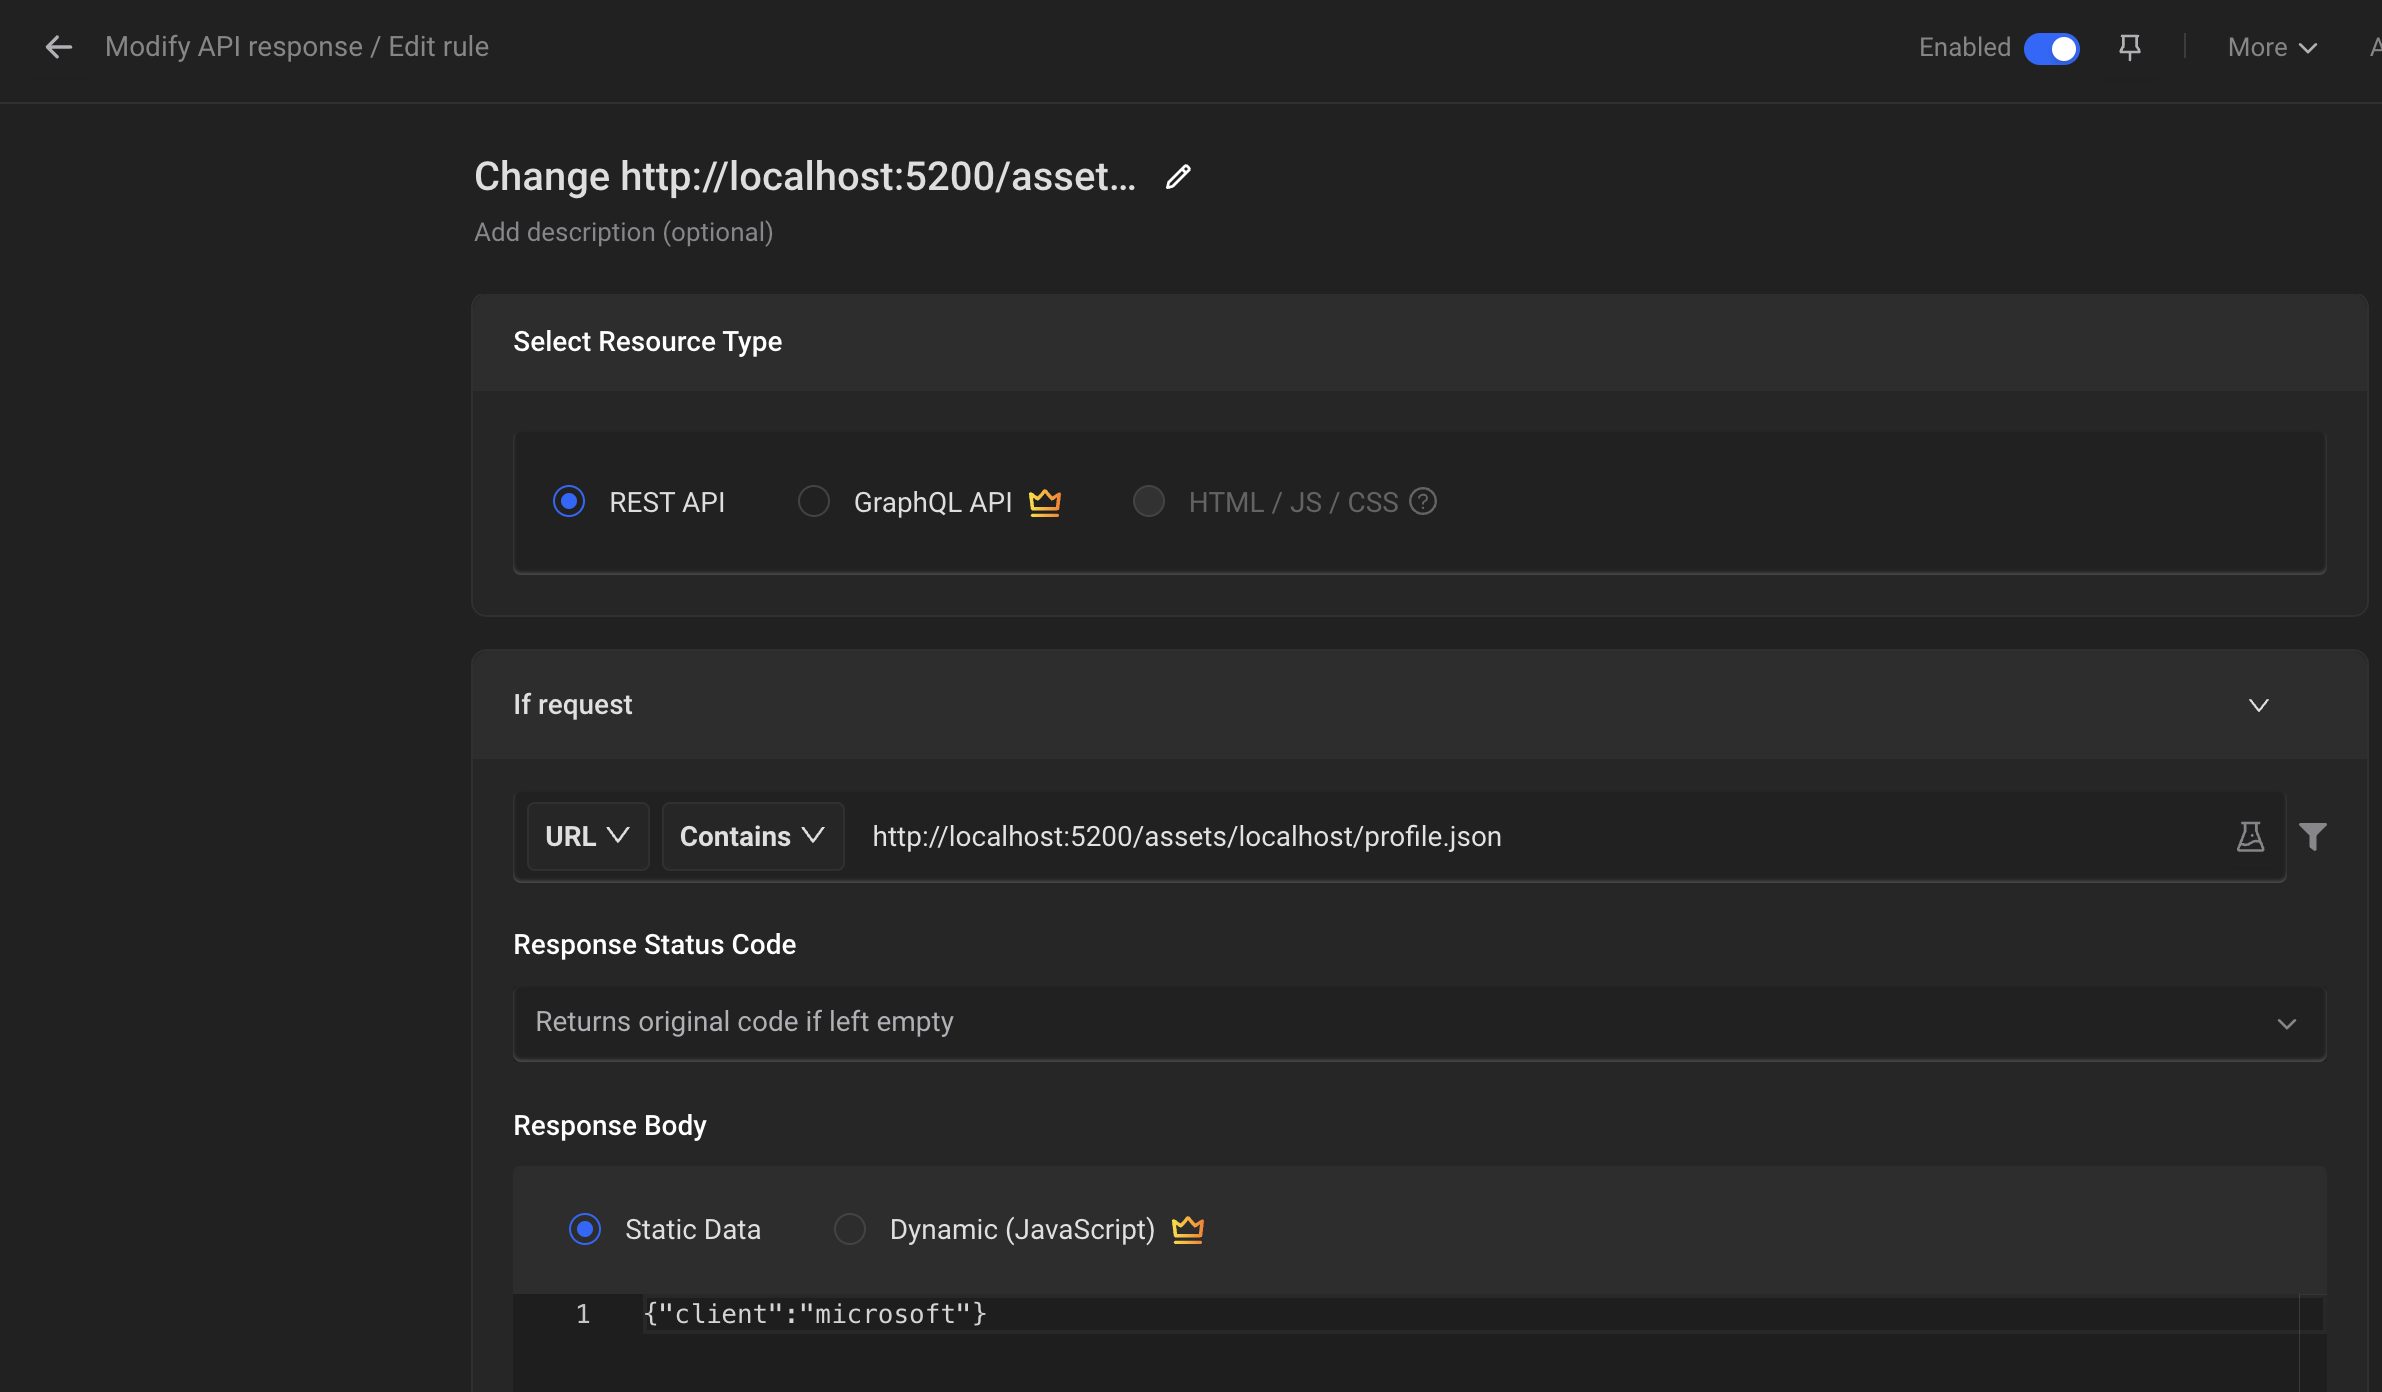
Now without the above rules, it renders the application for client1 – loading its logo and applying its branding. But with the rules in place, it renders the application for client2 correctly.

Wrap up
I hope people will find it useful. You can find the working code examples at https://github.com/codef0rmerz/multi-tenant-application
